Linking Social Account by Gigya in WKWebview
I. What is Gigya?
Gigya offers an identity management platform for businesses which includes products for customized registration, social login, user profile and preference management, user engagement and loyalty, and integrations with third-party marketing and services platforms.
Integrating Lytics with GIGYA allows you to pull insights from your users’ login patterns, subscriptions, and GIGYA ID which is often used as an identifier across platforms. You can also export Lytics audience membership containing behavioral scores and content affinities to personalize your brand experiences delivered to existing GIGYA users.
II. Gigya used for?
Gigya enables its customers to integrate social media into their website applications through hosted solutions and services such as social login and gamification. One of Gigya’s most popular apps lets customers enhance live events–such as awards shows and industry conventions–with online, real-time social chat tools.
The following social providers currently support the login operation: Amazon, Blogger, Facebook, GooglePlus, Kakao, LINE, LinkedIn, Messenger, mixi, Yahoo, Yahoo Japan, Twitter, etc….
III. Integrating in your iOS project
Requirements: iOS 10.0+, with Swift 5.1.2 and above.
- Implement
- Integrating using binary file.
In order to integrate the Swift SDK into your project, please download and add the following .framework files to your Frameworks and Libraries s ections and set the Embed to Embed & Sign

Under the Build Phases tab in your Target, click the + button on the top left and then select New Run Script Phase. After, setup the build phase as follows and make sure this phase is below the Embed Frameworks phase.

-
- Integrating using Swift Package Manager.
In Xcode, select File > Swift Packages > Add Package Dependency.
Follow the prompts using the URL for this repository.
-
- Integrating using Cocoapods.
For the base SDK, open your Podfile and add this follow line:

And then install it by following:

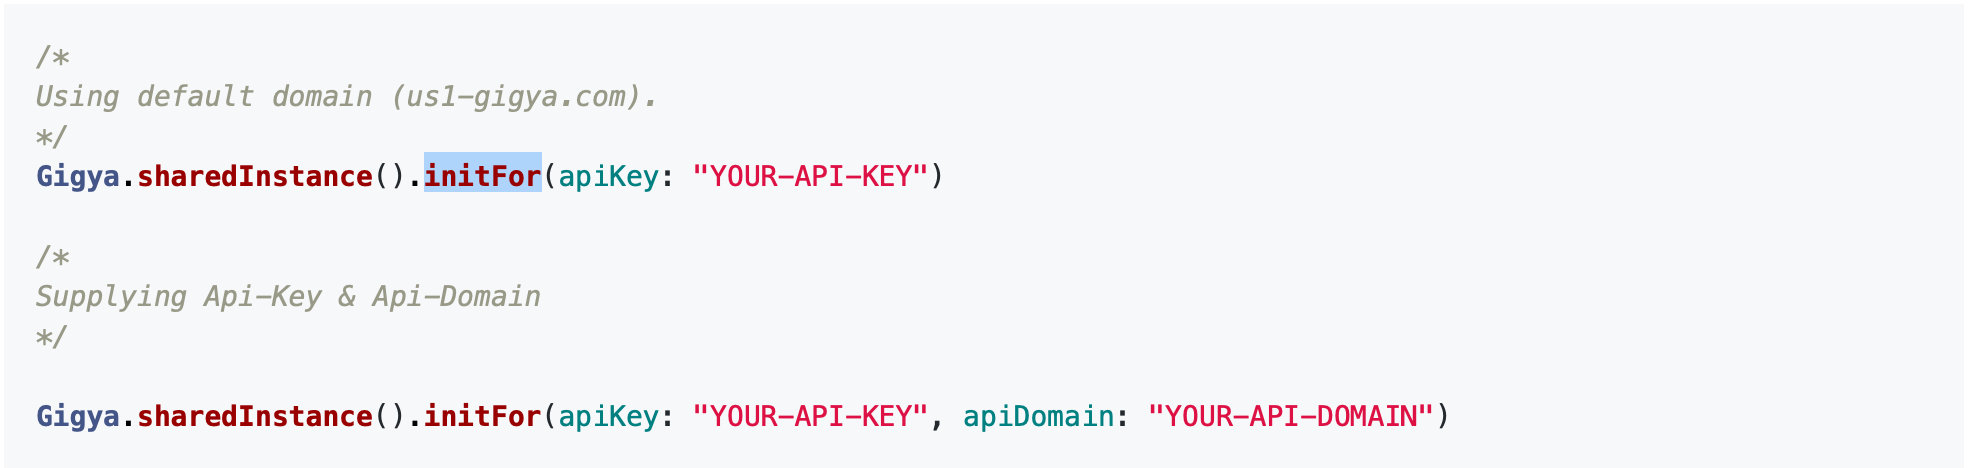
2. Initialization
Initialize at AppDelegate.swift file, you need define api-key and api-domain
3. Login With A Specified Provider
Some provider need native login: Apple, Facebook, Google, Line, Wechat…, eg: login with facebook below:
IV. Attack to WKWebview
You can attack to webview with gigya, and link with your mobile app.
Sending a Request
You can send anonymous requests to Gigya using the SDK using one of two overloads:
General - this will return an dictionary (see the section below on how to access its data).
Typed - this will return an instance of the provided class.
The following example sends an “accounts.verifyLogin” request using the current logged in user’s UID field to verify that the current session is still valid.
From this point, code blocks will use the Gigya interface as member variable (gigya), as if it was already initialized.
/*
Setup a map of parameters.
*/
let params = ["UID": "YOUR-ACCOUNT-UID"]

/*
Sending "verifyLogin" REST api.
*/
let api = "accounts.verifyLogin";

/*
Send a POST request. Will receive a general purpose Dictionary object in the success block.
 */
gigya.send(api: api, params: params) { (result) in
   switch result {
   case .success(let data):
       // Success - data is Dictionary
       case .failure(let error):
          break
   }
}


/*
Send a typed POST request. Will receive parsed MyAccount object in the success block.
 */
gigya.send(dataType: MyAccount.self, api: api, params: params) { (result) in
    switch result {
    case .success(let data):
        // Success - data is MyAccount
         case .failure(let error):
            break
    }
}
GigyaApiResult Enum with Associated Values
The SDK provides a custom response enum for encapsulating Gigya API’s responses.
This Enum exposes multiple cases that can help simplify your flow.
Here are a few examples of a given response:
You can find the list of available Gigya API endpoints and their required parameters in the REST API Reference.
/*
Switch result (GigyaApiResult Enum) - return in all api requests
*/
switch result {
   case .success(let data):
      // Success - data can be your custom schema or dictionary
      case .failure(let error):
     // Failure - error is a another Enum, example:
           switch error {
              case .gigyaError(let data):
               // data is GigyaError
              case .providerError(let data):
                // data is an error from privider (String)
              case .networkError(let error):
               // error is an network error
              case .jsonParsingError(let error):
              // error is an error from json parsing ( when the json parsing fail )
              case .emptyResponse:
             // unknown error
         }
}
Login & Registration
Site login & registration via API calls (to differ from social login & registration) is available using the login/register methods.
Site Login & Registration
Here are a few examples for login/register usage:
Login via loginID & password:
gigya.login(loginId: "LOGIN-ID", password: "PASSWORD") { result in
    switch result {
    case .success(let data):
      // Success
    case .failure(let error):
     // Fail
   }
}

Register via email & password:
/*
Registering with a custom session expiration parameter.
*/
let params = ["sessionExpiration": expiration!] as [String : Any]
gigya.register(email: "email", password: "password", params: params) { result in
    switch result {
    case .success(let data):
     // Success
    case .failure(let error):
     // Fail
   }
}
Social Login
Logging-in using a social network is one of the key features of the Gigya Swift SDK.
The following social providers currently support the login operation:
Amazon
Blogger
Facebook
FourSquare
GooglePlus
Kakao
LINE
LinkedIn
Livedoor
Messenger
mixi
Naver
Netlog
Odnoklassniki
Orange France
PayPalOAuth
Tencent QQ
Renren
Sina Weibo
Spiceworks
Twitter
VKontakte
WeChat
WordPress
Xing
Yahoo
Yahoo Japan
All supported providers constants are available using GigyaSocialProviders enum.
The following providers support native login using their own SDKs: Facebook, Google, Line, WeChat.
Please make sure to follow each configuration implementation mentioned in the "Configuring Native Login" section.
Having native support will require you to add the provider's library dependency to your application.
Provider Selection Screen
You can show a dialog with defined social providers in the following way:
/*
Show providers selection UI for selected providers
*/
gigya.socialLoginWith(providers: [.facebook, .google, .line], viewController: self, params: [:]) { (result) in
    switch result {
    case .success(let data):
      // Success
    case .failure(let error):
     // Fail
   }
}
Here is a screenshot using the above implementation:
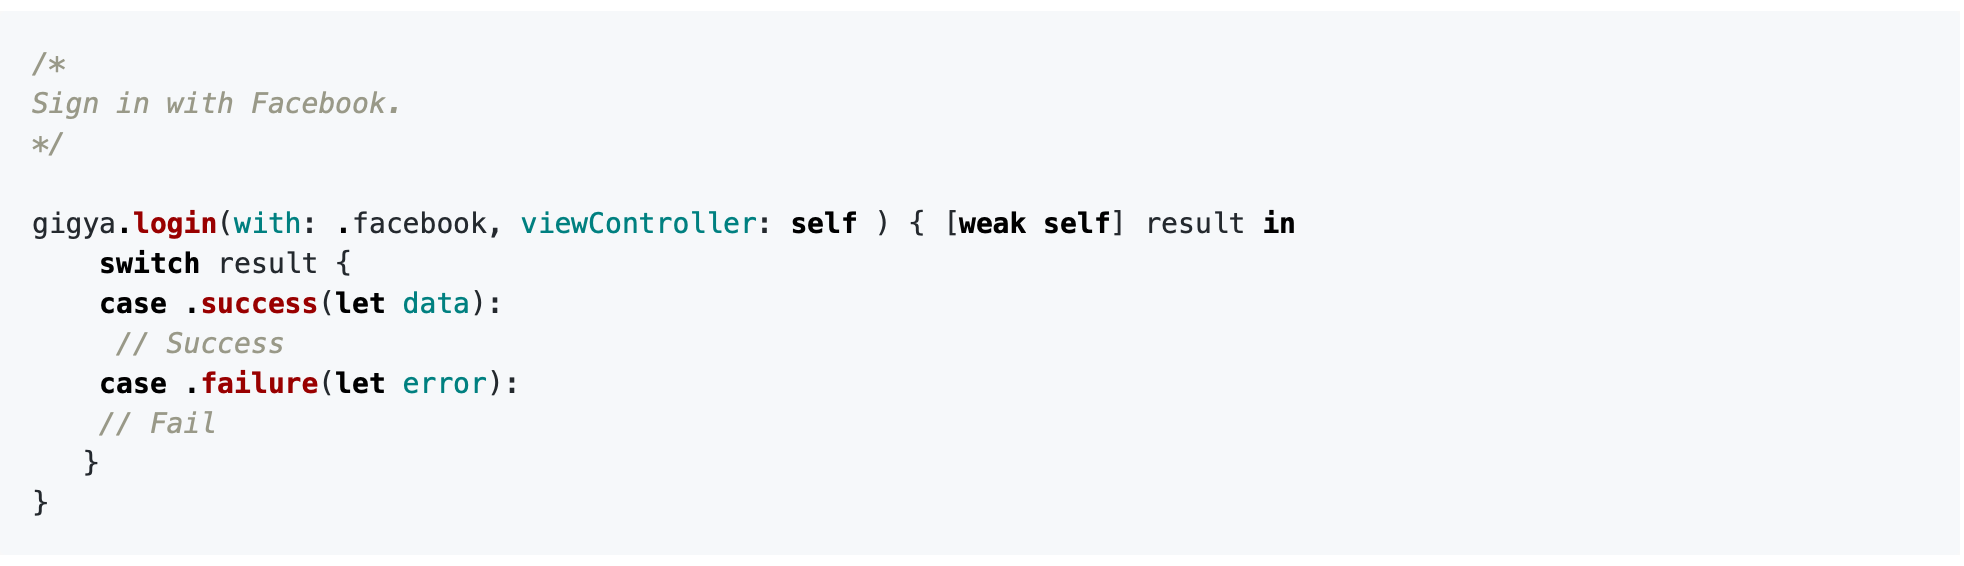
Login With A Specified Provider
Alternatively, you can initiate social login flow to a specific social provider:
/*
Sign in with Facebook.
*/

gigya.login(with: .facebook, viewController: self ) { [weak self] result in
    switch result {
    case .success(let data):
     // Success
    case .failure(let error):
    // Fail
   }
}
Configuring Native Login
For some social providers, the SDK supports social login via the social provider’s native implementation.
It is done by using the provider’s native SDK, so it will require you to add its required libraries and wrappers to your Swift project.
We will review the relevant providers and their implementation flow.
Apple
Using Sign in With Apple is mandatory if you want users to login via Apple. The first step is to go to your Xcode project settings and add AuthenticationServices.framework to the frameworks tab.
Next step you need to allow Sign in with Apple, go to “Signing & Capabilities” section.
Tap on + Capability and add Sign in With Apple.
After you have added AuthenticationServices.framework to your project you next need to import the AppleSigninWrapper.swift file from the GigyaProviders dictionary to your Xcode project.
An example of login flow to a Apple provider:
gigya.login(with: .apple, viewController: self ) { [weak self] result in
    switch result {
    case .success(let data):
    // Success
    case .failure(let error):
    // Fail
   }
}
Apple requires all apps to revoke user access tokens via their endpoint located at https://appleid.apple.com/auth/revoke in order to be reviewed. This behavior has been added to the accounts.deleteAccount endpoint and is handled automatically when you delete an end-user from your partner that has logged in with Apple.
Swift SDK currently supports iOS SDK version 12.3.2 via external provider implementation.
Adding Facebook native login to your iOS app is mandatory if you want to login via Facebook.
To do so, set up your Facebook app in your XCodeproject using the following instructions:
If you do not yet have an active Facebook app please see our Facebook documentation.
Instructions for adding Facebook SDK to your iOS device can be found at Facebook SDK for iOS.
After completing to add the Facebook SDK to your project you need to import “FacebookWrapper.swift” file from “GigyaProviders” dictionary to your Xcode project.
Using Google Sign-In is mandatory if you want users to login via Google.
Instructions for adding Google Sign-in to your iOS device can be found at Google Sign-In for iOS.
Add the following tag to your plist file. It is recommended that the “GoogleClientID” String and “GoogleServerClientID” be placed in the your Info.plist file.
GoogleClientID:
GoogleServerClientID:
After you have completed to add Google Sign-in to your project you need to import GoogleWrapper.swift file from “GigyaProviders” dictionary toyour Xcode project.
Line
The Gigya Swift SDK allows you to enable LINE native login for users that have the LINE app installed on their iOS devices.
Instructions can be found at Integrating LINE Login with an iOS app.
After you have completed adding Line SDK to your project you need to import “LineWrapper.swift” file from the “GigyaProviders” dictionary to your Xcode project.
The Gigya Swift SDK allows you to enable WeChat native login for users that have the WeChat app installed on their iOS device.
Instructions can be found at WeChat for iOS.
Add the following tag to your plist file, It is recommended that the “WeChatAppID” String be placed in the your Info.plist file.
After you have completed adding the WeChat SDK to your project you need to import “WeChatWrapper.swift” file from the “GigyaProviders” dictionary to your Xcode project.
Notes:
The signature generation tool must be installed on the mobile device.
You will not be able to test WeChat functionality using an emulator. WeChat requires a physical mobile device.
Once you update your app signature in the WeChat console, it could take a couple of hours to update.
If you experience problems and notice errCode -6 from WeChat while debugging, it means the signature isn't correct.
SSO (Single Sign-on)
Single Sign-On (SSO) is an authentication method that allows a user to log in to multiple applications that reside within the same site group with a single login credential.
Requirements:
- Mobile SSO requires iOS 13+.
- You will be required to setup you central login page on your site’s console.
The SDK will use the following redirect schema structure:
gsapi://app-bundle-id/login/
Please make sure you add your unique URL to the Trusted Site URLs section of your parent site.
Finally, to initiate the flow, use the SSO function provided by the Gigya shared interface.
Gigya.sharedInstance().sso(viewController: viewController) { result in
                switch result {
                case .success(data: let data):
                    print(data)
                    isLogged = true
                case .failure(_):
                    break
                }
            }
FIDO/WebAuthn Authentication
FIDO is a passwordless authentication method that enables password-only logins to be replaced with secure and fast login experiences across websites and apps.
Our SDK provides an interface to register a passkey, login, and revoke passkeys created using Fido/Passkeys, backed by our WebAuthn service.
SDK limitations:
Only one passkey is supported at a time. Once registering a new key, the client’s previous key will be automatically revoked.
SDK prerequisites:
iOS 16+
To use Fido authentication on mobile, make sure you have correctly set up your Fido Configuration section under the Identity -> Security -> Authentication tab of your SAP Customer Data Cloud console.
Interoperability with your website
You must have an associated domain with the webcredentials service type when making a registration or assertion request; otherwise, the request returns an error. See Supporting associated domains for more information.
Implementation.
The Fido interface contains 3 methods:
Registration:
Registering a new passkey can be performed only when a valid session is available.
let result = await gigya.webAuthn.register(viewController: self)
        switch result {
        case .success(let data):
          <#code#>
        case .failure(let error):
          <#code#>
        }
Login:
Logging in using a valid passkey.
 let result = await gigya.webAuthn.login(viewController: self)
                switch result {
                case .success(let data):
                    <#code#>
                case .failure(let error):
                    <#code#>
                }
Revoke:
Revoking the current passkey. Logging in will not be available until registering a new one.
let result = await gigya.webAuthn.revoke()
        switch result {
        case .success(let data):
          <#code#>
        case .failure(let error):
          <#code#>
        }
Logout
A simple logout is available by using:
gigya.logout()
Logging out will clear all session data from the device.
Messaging service
Using Google Firebase
An active Firebase account is needed in order to integrate the push TFA service.
Instructions on how to add Firebase into your iOS application can be found here.
Add Firebase to your iOS project
Setting up your application to use cloud messaging
Once you have your Firebase up and running, you are able to register your application in the cloud messaging tab of your project settings page.
Go to your Firebase console and select your project and open project settings as shown:
Select the "Cloud Messaging" tag and copy your Server key.
Use the copied Server key and update your site console RBA settings.
Adding The Gigya messaging service
Enable remote notifications.
Go to your project target -> Capabilities -> Background Modes -> Remote notifications (Enable if needed).
Allow Firebase to send foreground notifications.
After you called FirebaseApp.configure() add the follow line:
FirebaseApp.configure()
Messaging.messaging().shouldEstablishDirectChannel = true
—
Add Firebase delegate:
The Gigya server requires the push token to be sent to it in order to send push notifications to your client devices. In order to do so, add the following to your AppDelegate.swift:
// MessagingDelegate implementation as shown in Firebase documentation.

func messaging(_ messaging: Messaging, didReceiveRegistrationToken fcmToken: String) {
  print("Firebase registration token: \(fcmToken)")
  let dataDict:[String: String] = ["token": fcmToken]
  NotificationCenter.default.post(name: Notification.Name("FCMToken"), object: nil, userInfo: dataDict)
  Gigya.sharedInstance().updatePushToken(key: fcmToken)
}

// Foreground notification receive

func messaging(_ messaging: Messaging, didReceive remoteMessage: MessagingRemoteMessage) {
  Gigya.sharedInstance().foregroundNotification(with: remoteMessage.appData)
}
“
Handling push notifications.
In order to let the SDK handle incoming TFA push notifications, add the following to you AppDelegate.swift as well.
func application(_ application: UIApplication, didReceiveRemoteNotification userInfo: [AnyHashable : Any], fetchCompletionHandler completionHandler: @escaping (UIBackgroundFetchResult) -> Void) {
    // Enable Gigya's handling of the notification.
    Gigya.sharedInstance().receivePush(userInfo: userInfo, completion: completionHandler)
}
Notification interaction:
Customer Data Cloud’s notifications require action confirmations. Whether it is to approve or deny the opt-in or login process. In order to open the actions alert confirmation you will need to add the following to your AppDelegate.swift.
@available(iOS 10.0, *)

extension AppDelegate: UNUserNotificationCenterDelegate {
   func userNotificationCenter(_ center: UNUserNotificationCenter, didReceive response: UNNotificationResponse, withCompletionHandler completionHandler:@escaping () -> Void) {
      // tap on notification interaction
      Gigya.sharedInstance().verifyPush(with: response)
   }
}
Configuring Session Expiration
Fixed Length Sessions
Starting a new session via register or login is also available with a fixed time span expiration constraint.
For example:
/*
Adding a 600 seconds session expiration constraint.
*/
gigya.login(loginId: "EMAIL", password: "PASSWORD", params: ["sessionExpiration": "600"]) { [weak self] result in
   switch result {
   case .success(let data):
   // success
   case .failure(let error):
   // failed
  }
}
When the session expires, the SDK will notify about it via NotificationCenter.
In order to be notified of session changes, you will need to addObserver in your ViewController, for example:
func viewDidLoad() {
   NotificationCenter.default.addObserver(self, selector: #selector(gigyaSessionExpire(_:)), name:
   Notification.Name("didGigyaSessionExpire"), object: nil)
}

@objc func gigyaSessionExpire(_ notification: Notification) {
   // Your session has expired
}
Session Validation
Verify Login Interval
The Swift SDK can track a user’s current session and determine if there were changes to the site’s schema and require re-authentication for the user when necessary.
For example, this can be used to invalidate a user’s active session if their previously agreed Terms of Service consent version has changed.
When using session verification, the client application will be informed, via ‘NotificationCenter’, if the automatic verification fails. This will allow your application to perform the necessary logic in order to re-authenticate the user.
To implement this flow, add the following key/value to your app’s .plist file:
GigyaSessionVerificationInterval : Integer (the length of time, in seconds, to check the user's profile against the site's schema).
When the verification fails, the SDK will send a notification about it via NotificationCenter.
In order to be notified of session changes, you will need to use addObserver in your ViewController.
for example:
func viewDidLoad() {
   NotificationCenter.default.addObserver(self, selector: #selector(gigyaInvalidSession(_:)), name: Notification.Name("didInvalidateSession"), object: nil)
}

@objc func gigyaInvalidSession(_ notification: Notification) {
   // Verification fails
}
Account Handling
Gigya’s Swift SDK allows you to get a smooth developing experience by binding the SDK’s main Gigya instance to a class of the same structure
as your schema.
This will allow the SDK to accept and return account instances according to your specification.
Here is an example of a custom Account Schema struct, which corresponds with the above site’s Schema.
struct MyAccount: GigyaAccountProtocol {

   var UID: String?
   var profile: GigyaProfile?
   var UIDSignature: String?
   var apiVersion: Int?
   var created: String?
   var createdTimestamp: Double?
   var isActive: Bool?
   var isRegistered: Bool?
   var isVerified: Bool?
   var lastLogin: String?
   var lastLoginTimestamp: Double?
   var lastUpdated: String?
   var lastUpdatedTimestamp: Double?
   var loginProvider: String?
   var oldestDataUpdated: String?
   var oldestDataUpdatedTimestamp: Double?
   var registered: String?
   var registeredTimestamp: Double?
   var signatureTimestamp: String?
   var socialProviders: String?
   var verified: String?
   var verifiedTimestamp: Double?
   var data: MyData?
}

struct MyData: Codable {
   var subscribe: Bool?
   var terms: Bool?
   var comment: String?
}
We can initialize a Gigya instance with the MyAccount struct, and see the account methods operate accordingly.
Get Account
In order to retrieve the current account you can use the “getAccount” method:
gigya.getAccount() { result in
   switch result {
   case .success(let account):
     // Success
     print(account.profile)
   case .failure(let error):
     // Fail
   }
}
In order to improve the end-user’s experience by avoiding unnecessary network requests, the SDK caches the current account data for a period of 5 minutes (by default).
The account cache property can be set via the JSON configuration file or by adding a meta-data tag as show in the initializationsection of the document.
To bypass the account’s caching you must provide true when requesting a new account:
gigya.getAccount(true) { result in
   switch result {
   case .success(let account):
    // Success
    print(account.profile)
   case .failure(let error):
    // Fail
   }
}
Set Account
The SDK provides two options for updating a user account data.
When you inherit from GigyaAccountProtocol, the relevant profile fields will be inherited and you can add the data field according to your schema.
Using “getAccount” requires you to have a valid session.
Using “setAccount” requires you to have a valid session.
In order to avoid unnecessary errors, please make sure that the fields you trying to update are marked as “client Modify” in the site’s
/*
Using live data to keep track of account object changes.
*/
gigya.setAccount(with: myAccountLiveData) { result in
   switch result {
   case .success(let account):
     // Success
     print(account.profile)
   case .failure(let error):
     // Fail
   }
}
Using Screen-Sets
Screen-Sets, as one of Gigya’s most powerful features, are available also on your mobile app!
The SDK provides a simple interface for using & displaying screen-sets via the PluginViewController & the GigyaPluginEvent components.
ShowScreenSets method
Using screen-sets is available using the “showScreenSet” method of the Gigya interface.
Here is an example of using the SDK’s showScreenSet method using the default “Registration-Login” screen set:
/*
Showing "Registration-Login" screen set in a dialog mode. Use only the onLogin case to be notified when logging in event was fired.
*/

gigya.showScreenSet(with: "Default-RegistrationLogin", viewController: self) { result in
   switch result {
   case .onLogin(let account):
     // Login success.
   default:
     break
   }
}
The “showScreenSets” method available parameters include all the parameters the web screen-sets plugin can receive.
GigyaPluginEvent Enum
This return object is an enum which is aligned to all optional plugin events fired by the screen-sets plugin.
schema. You can verify this using Gigya's Admin Console, in your site's Schema Editor page under the Settings panel.
Here is the Enum to its extent. You can use separate case by add default to the switch case:
switch result {
   case .onLogin(let account):
    // onLogin event
   case .onBeforeValidation(let event):
    // onBeforeValidation event
   case .onBeforeSubmit(let event):
    // onBeforeSubmit event
   case .onSubmit(let event):
    // onSubmit event
   case .onAfterSubmit(let event):
    // onAfterSubmit event
   case .onBeforeScreenLoad(let event):
    // onBeforeScreenLoad event
   case .onAfterScreenLoad(let event):
    // onAfterScreenLoad event
   case .onFieldChanged(let event):
    // onFieldChanged event
   case .onHide(let event):
    // onHide event
   case .onLogout:
    // onLogout event
   case .onConnectionAdded:
    // onConnectionAdded event
   case .onConnectionRemoved:
    // onConnectionRemoved event
   case .error(let event):
    // error event
}
Business APIs
The Gigya SDK provides popular built-in flows for fluent development.
Currently available:
login
register
logout
getAccount
setAccount
addConnection
removeConnection
The plugin event is also typed to the current Account schema.
Business APIs are provided in order to give you an easier interface. If a more detailed and customized use is required, you can still use
the generic Gigya.send interface for all request purposes.
Interruptions
Some flows can be “interrupted” due to certain Site policies.
For example, when trying to register but Two Factor Authentication is required – then an “interruption” can occur about “pending TFA registration” that will require the end user to setup a TFA method before being able to complete the registration flow.
Interruptions map:
The SDK’s Business APIs are design to help to easily develop a friendly way to face and resolve those interruptions in order to get the end user logged in and still complying to the site’s policies.
Handling Interruptions
Interruption handling is a key feature introduced as of v1 of the Swift SDK.
The SDK will expose a resolver object for supported interruptions in order to give you as a developer the ability to resolve them within the same flow that they were triggered.
The current supported interruption flows are:
Pending registration
Account linking
Pending TFA registration.
Pending TFA verification
All interruption flows are implemented in the provided Sample project.
Interruptions handling – Account linking example
We will start with a simple register request for an email address that is already registered:
gigya.register(email: "EMAIL-ADDRESS-ALREADY-REGISTERED", password: "PASSWORD") { result in
   switch result {
   case .success(let data):
    // Success
   case .failure(let error):
    // Fail
  }
}
As expected we will receive an error which indicates that this login identifier already exists in the system (errorCode 403043 ).
Usually when receiving that kind of error, we would trigger an API call to retrieve the conflicting accounts (via accounts.getConflictingAccount), then try to login with one of the supported account’s identities (using mode:”link”).
However, the SDK can handle this interruption for us:
To do so, in our our GigyaLoginResult we will switch the conflictingAccounts case:
gigya.register(email: "EMAIL-ADDRESS-ALREADY-REGISTERED", password: "PASSWORD") { result in
   switch result {
   case .success(let data):
    // Success
   case .failure(let error):
    // Fail
    guard let interruption = error.interruption else { return }
    // Evaluage interruption.
   case .conflitingAccount(let resolver):
     break
   default:
     break
  }
}
While the response parameter contains the original response from the register API call (accounts.register), the resolver object (of type LinkAccountsResolver) already contains all we need in order to complete the flow:
We can get the conflicting accounts from it and try to link the account to them.
let accounts = resolver.conflictingAccount
let providers = accounts?.conflictingAccount
let loginID = accounts?.loginID

/*
In this example the providers list contains one "site" provider. Therefore we are now able to try and resolve the flow.
*/
resolver.linkToSite(loginId: loginID, password: "PASSWORD-REQUIRED-TO-VERIFY-THE-ORIGINAL-ACCOUNT")
Trying the resolve the flow will now try to login with the original conflicted account and link both accounts.
If the operation was successful, the original GigyaLoginResult will be notified and the flow will be directed to its original successcase.
In order to provide the end user with a fluid experience some UI intervention is recommended. Examples for this can be found in the Sample application.
Using the GigyaWebBridge explicitly.
You are able to use the GigyaWebBridge.swift class explicitly in order to attach Gigya’s web sdk actions into your own WebView implementation.
Attaching the GigyaWebBridge will allow you to add Gigya’s session management you your custom web implementation. Special cases include uses of SAML & captcha implementations. The following snippet demonstrates the basic implementation of the GigyaWebBridge.
/*
Generate a new GigyaWebBridge instance.
*/
let webBridge = Gigya.sharedInstance().createWebBridge()

/*
Attach newly create GigyaWebBridge to WKWebView instance.
*/

webBridge.attachTo(webView: webView, viewController: self) { [weak self] (event) in
   // Implement any case you require.
   switch event {
   case .onLogin(let account):
    // Logged in.
   default:
     break
  }
}
Biometric Authentication
End User & Biometric Authentication
The supported end user flow for the biometric authentication feature is:
An end user logs in.
An end user opts in to biometric authentication.
This will require the end user to verify his fingerprint.
The app is locked or being cleared from memory.
The end user is required to unlock the app in order to restore his session.
This will require the end user to verify his fingerprint.
The end user opts out of biometric authentication
The biometric fingerprint feature is a security encryption on top of an existing session of your app, therefore, calling any biometric
operations requires a valid session.
Authentication flow
In order to use biometric authentication, the following must apply:
The device has a Passcode.
The device has a TouchID/FaceID available.
Available authentication methods:
Opt-In - Opts-in the existing session to use fingerprint authentication.
Opt-Out - Opts-out the existing session from using fingerprint authentication.
Lock - Locks the existing session until unlocking it. No authentication based actions can be done while the session is locked.
Unlock - Unlocks the session so the user can continue to make authentication based actions.
Example of biometric authentication flow:
/*
Use authentication action
*/
gigya.biometric.optIn { (result) in

switch result {
   case .success:
     // Action success
   case .failure:
    // Action failed
  }
}
Prompt and FaceID
In order to use FaceID in a compatible device, you must include following key to your Info.plist file.
NSFaceIDUsageDescription = (String) “Your custom message”
Additionally, when you want to set a custom text in Touch ID prompt , you can include the following key:
GigyaTouchIDMessage = (String) “Your custom message” (default = “Please authenticate to proceed”).
Error reporting
The SDK contains an error reporting service that tracks critical SDK specific errors and reports them
back to us.
The service is disabled by default and can be activated using:
Gigya.sharedInstance().setErrorReporting(to: true)

